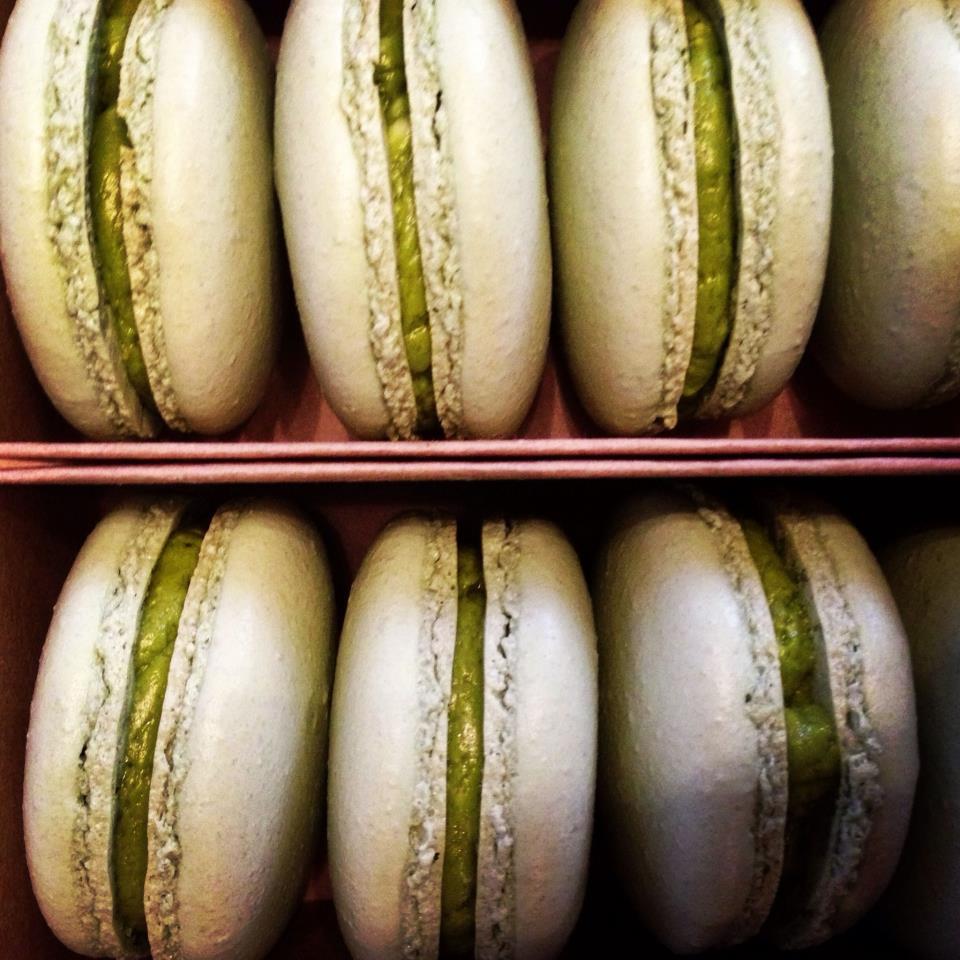
- “Macarons are not macaroons,” my friend often says. Though the pronunciations are debatable and can be confusing, they are, without a doubt, two totally different things. Most Americans are more familiar with the macaroon: a light meringue-based confection often consisting of shredded coconut or almond. The macaron is also meringue-based but has a smooth, flat shell and a ruffled “foot.” Two cookies are then sandwiched together with either buttercream, ganache, or jam as the filling.
Though there seems to be some ambiguity, macarons are mostly know as a French confection. The macaron has recently become increasingly popular in the United States, UK, Japan and Korea. People have simply become obsessed, and for good reason. The rainbow assortment of colors are enough to attract any conscious being and lure them into the shop. And then, you have your first bite: your teeth sinking into the light confection, first through the crisp outer shell, and then proceeding to the soft, chewy interior, moist with a sweet, creamy filling. With the seemingly unlimited variety of flavors, it’s hard not to get caught up in the macaron craze.
However, there’s one cold, harsh reality to the macaron: their price. Macarons are not cheap. Most cafes sell them starting around $2 a piece (including tax). And some well known bakeries and specialty macaron shops charge $4 for the 2 1/2 inch cookie.
To someone new to the macaron world, it might just seem like the bakeries are taking advantage of the macaron trend by overcharging their customers. Though that may be true to some small extent, macarons are simply expensive to make. A crucial ingredient in macarons is almond flour. When bought in supermarkets, almond flour can easily cost $12 a pound. Even when bought in bulk, the price per pound is between $5 to $10.
The process of making macarons is very tedious and delicate as well. Egg whites should be aged for up to 5 days to ensure the most stable meringue, and all dry ingredients should additionally be finely grained by a food processor. After piping the macarons, most recipes, usually the French and Swiss method but not the Italian, require a resting time for the macarons. The cookies must rest at least 30 minutes at room temperature before going into the oven.
So join the craze! If you don’t mind lightening your wallets, stop by Teahaus or Lab here in downtown Ann Arbor. For a more affordable option, order from my student-run macaron business, French Fortune! And if you’re up for a bigger challenge, try the recipe I use for my macarons below.
Slightly altered recipes from “Bouchon Bakery” by Thomas Keller and Sebastien Rouxel
FOR THE MACARON:
106 g of almond flour
106 g of powdered sugar
41 g and 45 g of egg whites
118 g plus a pinch of granulated sugar
Water
Food coloring
Because the cookies will be sandwiched, it is important that they be as close in size as possible. Use a compass or a cookie cutter as a guide and a dark marking pen. Trace 2 inch circles along the top edge, leaving 1 inch of space around them. Trace more circles below the first row, spacing them between the first circles. Continue with more rows until there is no more space. Turn the parchment over and lay it on a sheet pan. Lift up each corner of the parchment paper and spray the underside with nonstick spray to keep it from blowing up while the cookies are baking. Repeat with second sheet pan.
Sift the almond flour and powdered sugar into a large bowl and whisk together. Mound the almond flour mixture and then make a 4 inch well in the center, leaving a layer of the flour at the bottom. Pour in the 41 g of egg whites and combine with a spatula. Add your choice of food coloring and mix well.
Place the remaining 45 g of egg whites in the bowl of a stand mixer fitted with the whisk attachment. Place the 118 g of granulated sugar in a small saucepan and add just enough water so that the sugar is completely submerged. Heat over medium-high heat until the syrup reaches 230ºF/110ºC. The syrup should be boiling at this point.
Letting the syrup continue to cook, add the pinch of granulated sugar to the egg whites, turn the mixer to medium speed, and whip to soft peaks. If the whites reach soft peaks before the syrup is 248ºF/120ºC, reduce the speed to the lowest setting, just to keep them moving.
When the syrup reaches 248ºF/120ºC, most of the water should have boiled off, with only a small trace of steam arising from the syrup. Remove the pan from the heat. Turn the mixer to a medium-low speed, and slowly add the syrup, pouring it between the side of the bowl and the whisk; the meringue will deflate. Increase the speed to medium and whip for 5 minutes, or until the whites hold stiff, glossy peaks. Although the bowl will still be warm to the touch, the meringue should have cooled; if not, continue to whip until it is cool.
Fold one-third of the meringue into the almond mixture, then continue adding the whites a little at a time (you may not use them all) until when you fold a portion of the batter over on itself, the “ribbon” of batter moves slowly. The mixture shouldn’t be so stiff that it holds its shape without moving at all, but it also shouldn’t be so loose that it dissolves into itself and does not maintain the ribbon; it is better for the mixture to be slightly stiff than loose.
Preheat the oven to 350ºF (convection) or 400ºF (standard.)
Transfer the mixture to the pastry bag with a 1/2 inch tip. Hold the bad upright 1/2 inch above the center of one of the traced circles and pipe out enough of the mixture to fill in the circle. Lift away the piping bag and fill the remaining circles on the first pan. Lift up the sheet pan and tap the bottom of the pan to spread the batter evenly and smooth any peaks left by the pastry bag.
If using a convection oven, bake for 8 to 10 minutes, until the tops are shiny and crisp. If using a standard oven, place the sheet pan in the oven, immediately lower the oven temperature to 325ºF, and bake for 9 to 12 minutes, going for the same results. Set the pan on a cooling rack and cool completely. If using a standard oven, preheat it to 400ºF again.
Pipe the remaining meringue into the circles on the second sheet pan and bake as directed above. Let cool completely.
FOR THE FILLING:
37 g of egg white
75 g and 16 g of granulated sugar
Water
113 g of unsalted butter, cut into 1/2 inch pieces, at room temperature
Choice of flavoring e.g. jam, curd, cocoa powder
Place the egg whites in the bowl of a stand mixer fitted with the whisk attachment.
Place the 75 g sugar in a small saucepan, and add just enough water so that the sugar is completely submerged. Heat over medium-high heat until the syrup reaches 230ºF/110ºC.
Letting the syrup continue to cook, turn the mixer to medium speed, gradually pour in the remaining 16 g of sugar into the whites, and whip until the whites are beginning to form loose peak. If the whites are ready before the syrup reaches 248ºF/120ºC, reduce the speed to the lowest setting, just to keep them moving.
When the syrup reaches 248ºF/120ºC, remove the pan from the heat. Turn the mixer to medium-low speed and slowly add the syrup to the whites, pouring it between the side of the bowl and the whisk; the meringue will deflate. Increase the speed to medium and whisk for 15 minutes, or until the bottom of the bowl is at room temperature and the whites hold stiff peaks. (If the mixture is warm, it will melt the butter.)
Reduce the speed to medium and add the butter, a few pieces at a time. If at any point the mixture looks broken, increase the speed and beat to re-emulsify it, then reduce the speed and continue adding the butter. Check the consistency: if the buttercream is too loose to hold its shape, it should be refrigerated for up to a few hours to harden, then beaten again to return it to the proper consistency.
Add 50 g of jam or curd of your choosing. If using powder of any kind, add 1 tablespoon instead and more as needed. Mix for 1 minute, or until evenly combined.
The buttercream can be stored in a covered container in the refrigerator for up to 5 days for frozen for up to 1 month; defrost frozen buttercream in the refrigerator overnight before using. Thirty minutes before using the buttercream, place it in the bowl of a mixer fitted with the paddle attachment and allow to soften, then mix on low speed to return the buttercream to proper consistency for piping or spreading.
TO FILL THE COOKIES:
Transfer the buttercream to a pastry bag with a 3/8 inch tip.
Remove the macarons from the parchment paper. Turn half of them over. Starting in the center, pipe 10 g of the buttercream in a spiral pattern on one upside-down macaron, not quite reaching the edges. Top with a second macaron and press gently to spread the buttercream to the edges. Repeat with the remaining macarons and filling.
The macarons are best if wrapped individually in a few layers of plastic wrap and frozen for at least 24 hours or up to 2 weeks. Defrost in the refrigerator for 3 hours, then bring to room temperature before serving. They can be served the day they are made or stored in a covered container in the refrigerator for up to 2 days.
Enjoy!


